¶ Getting started
¶ Fundamentals
-
Invite the bot via the following link: Invite.
-
Create necessarities in Discord
1. Create a category where the ticket will be created in.
2. If you do no already have a support role, create one. -
Visit the Dashboard, login with your Discord account and select your server in the server overview.
-
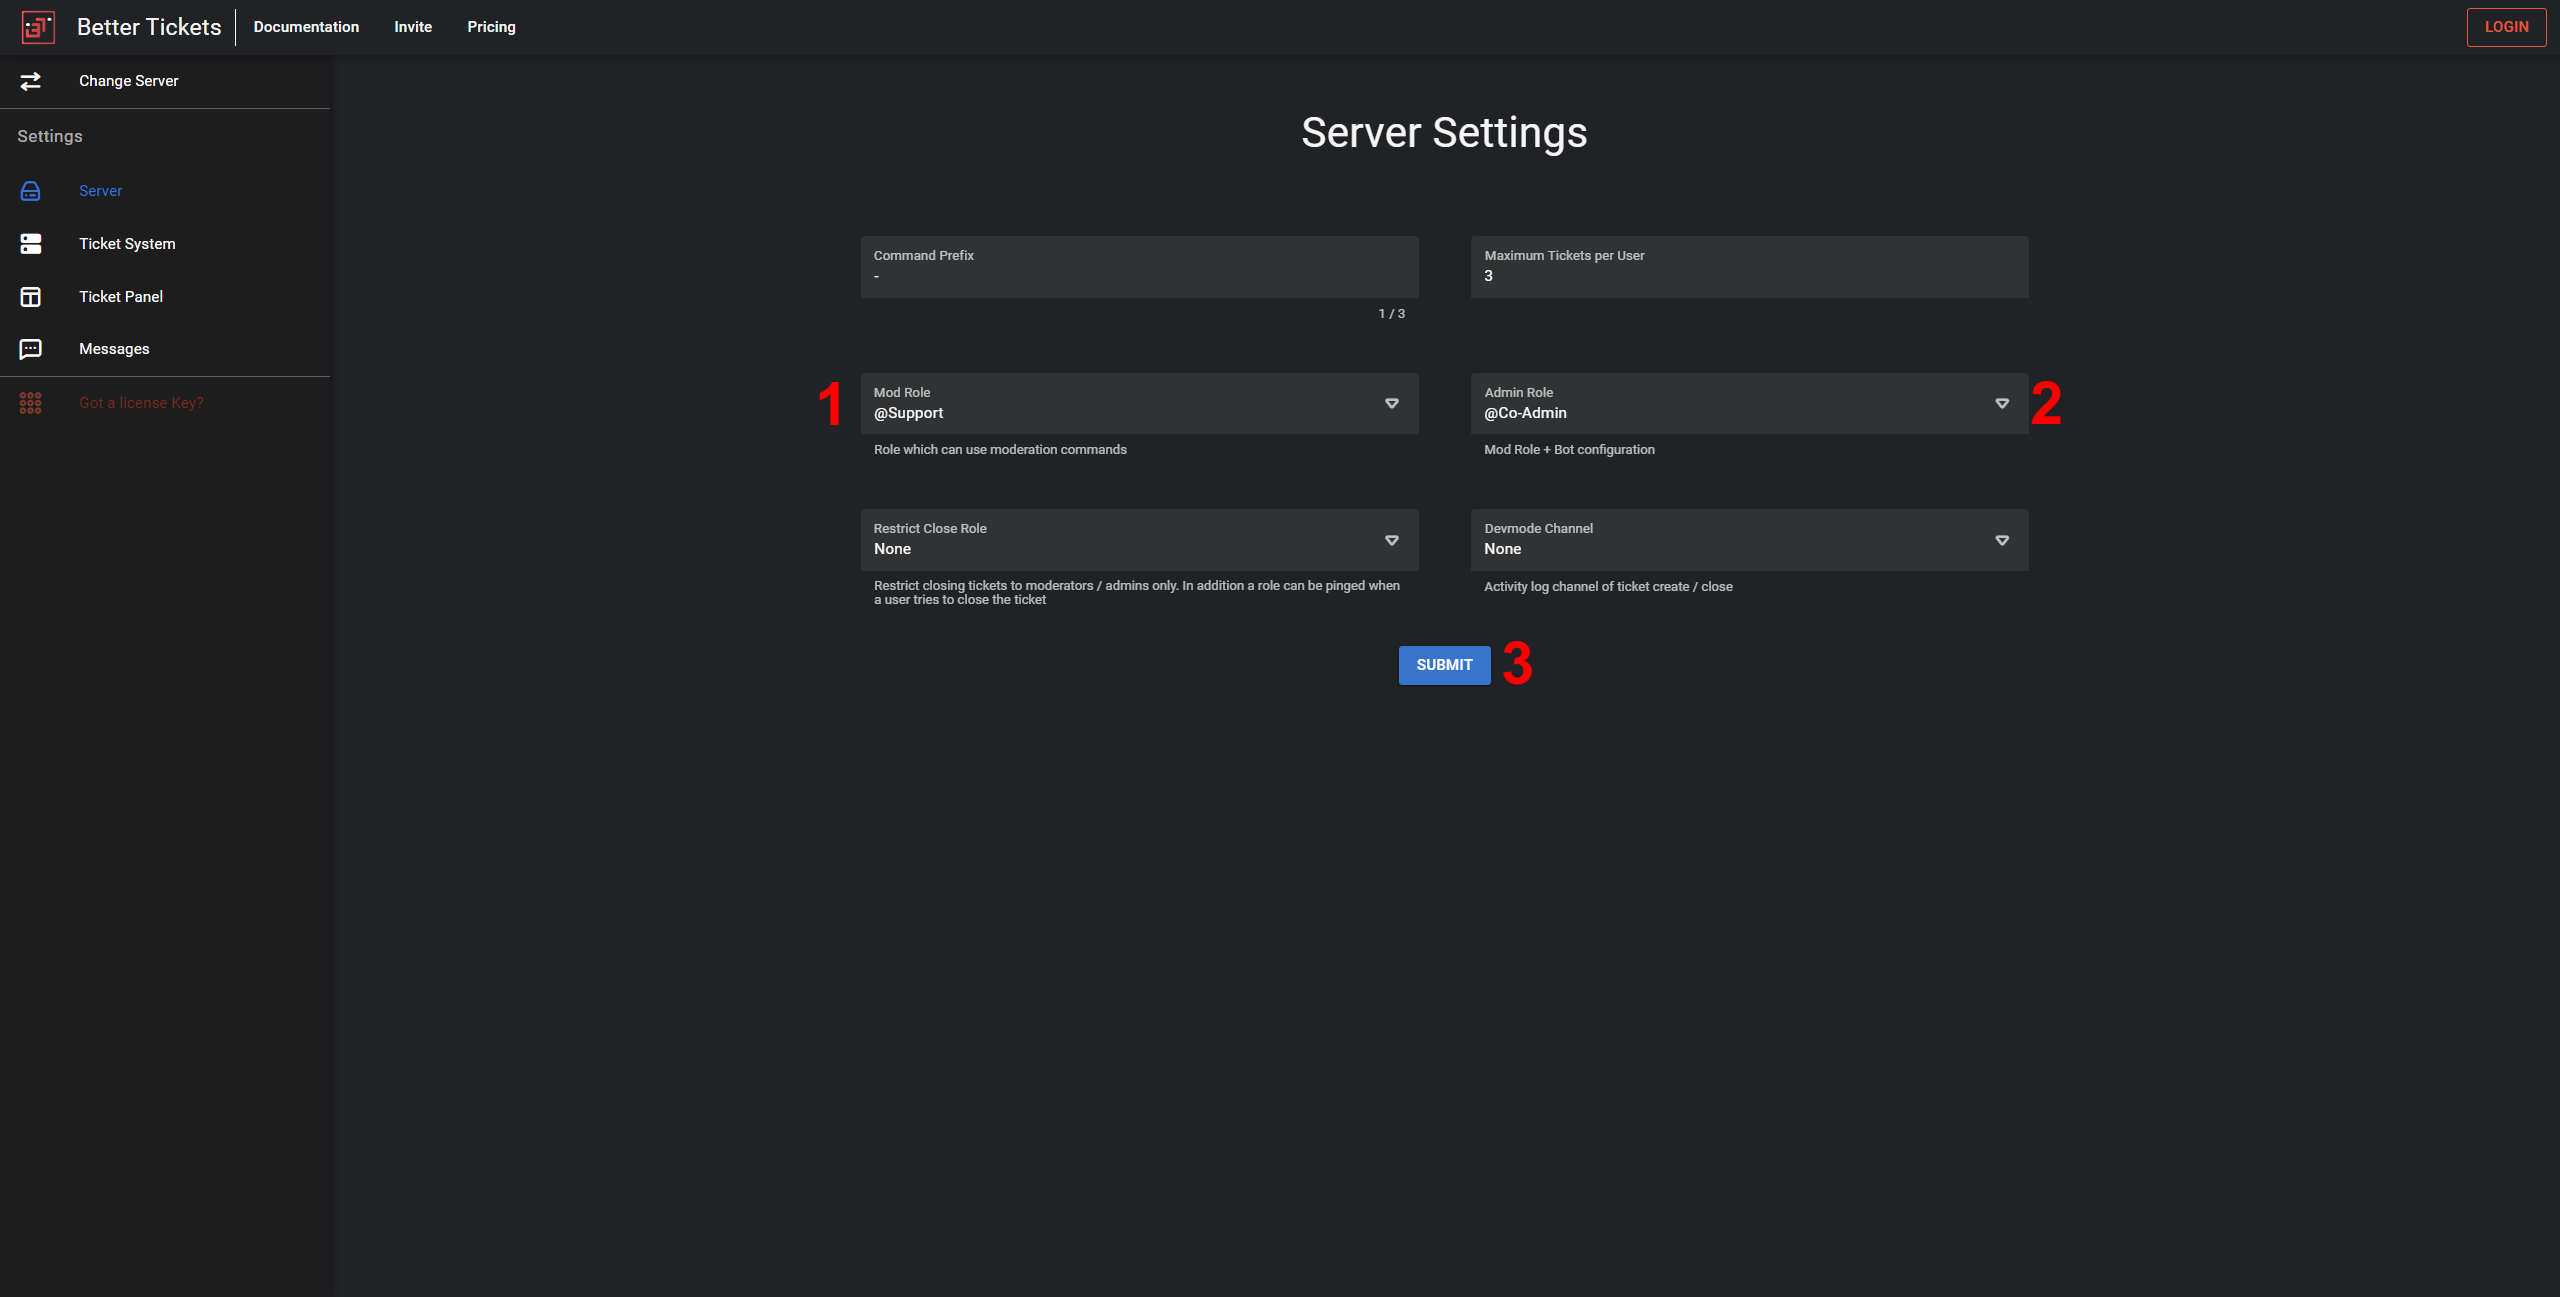
Configure your server
1. Select your previously created supporter role.
2. Optional: Select a role which should be able to configure the bot besides the owner and server administrators.
3. Submit your changes.
-
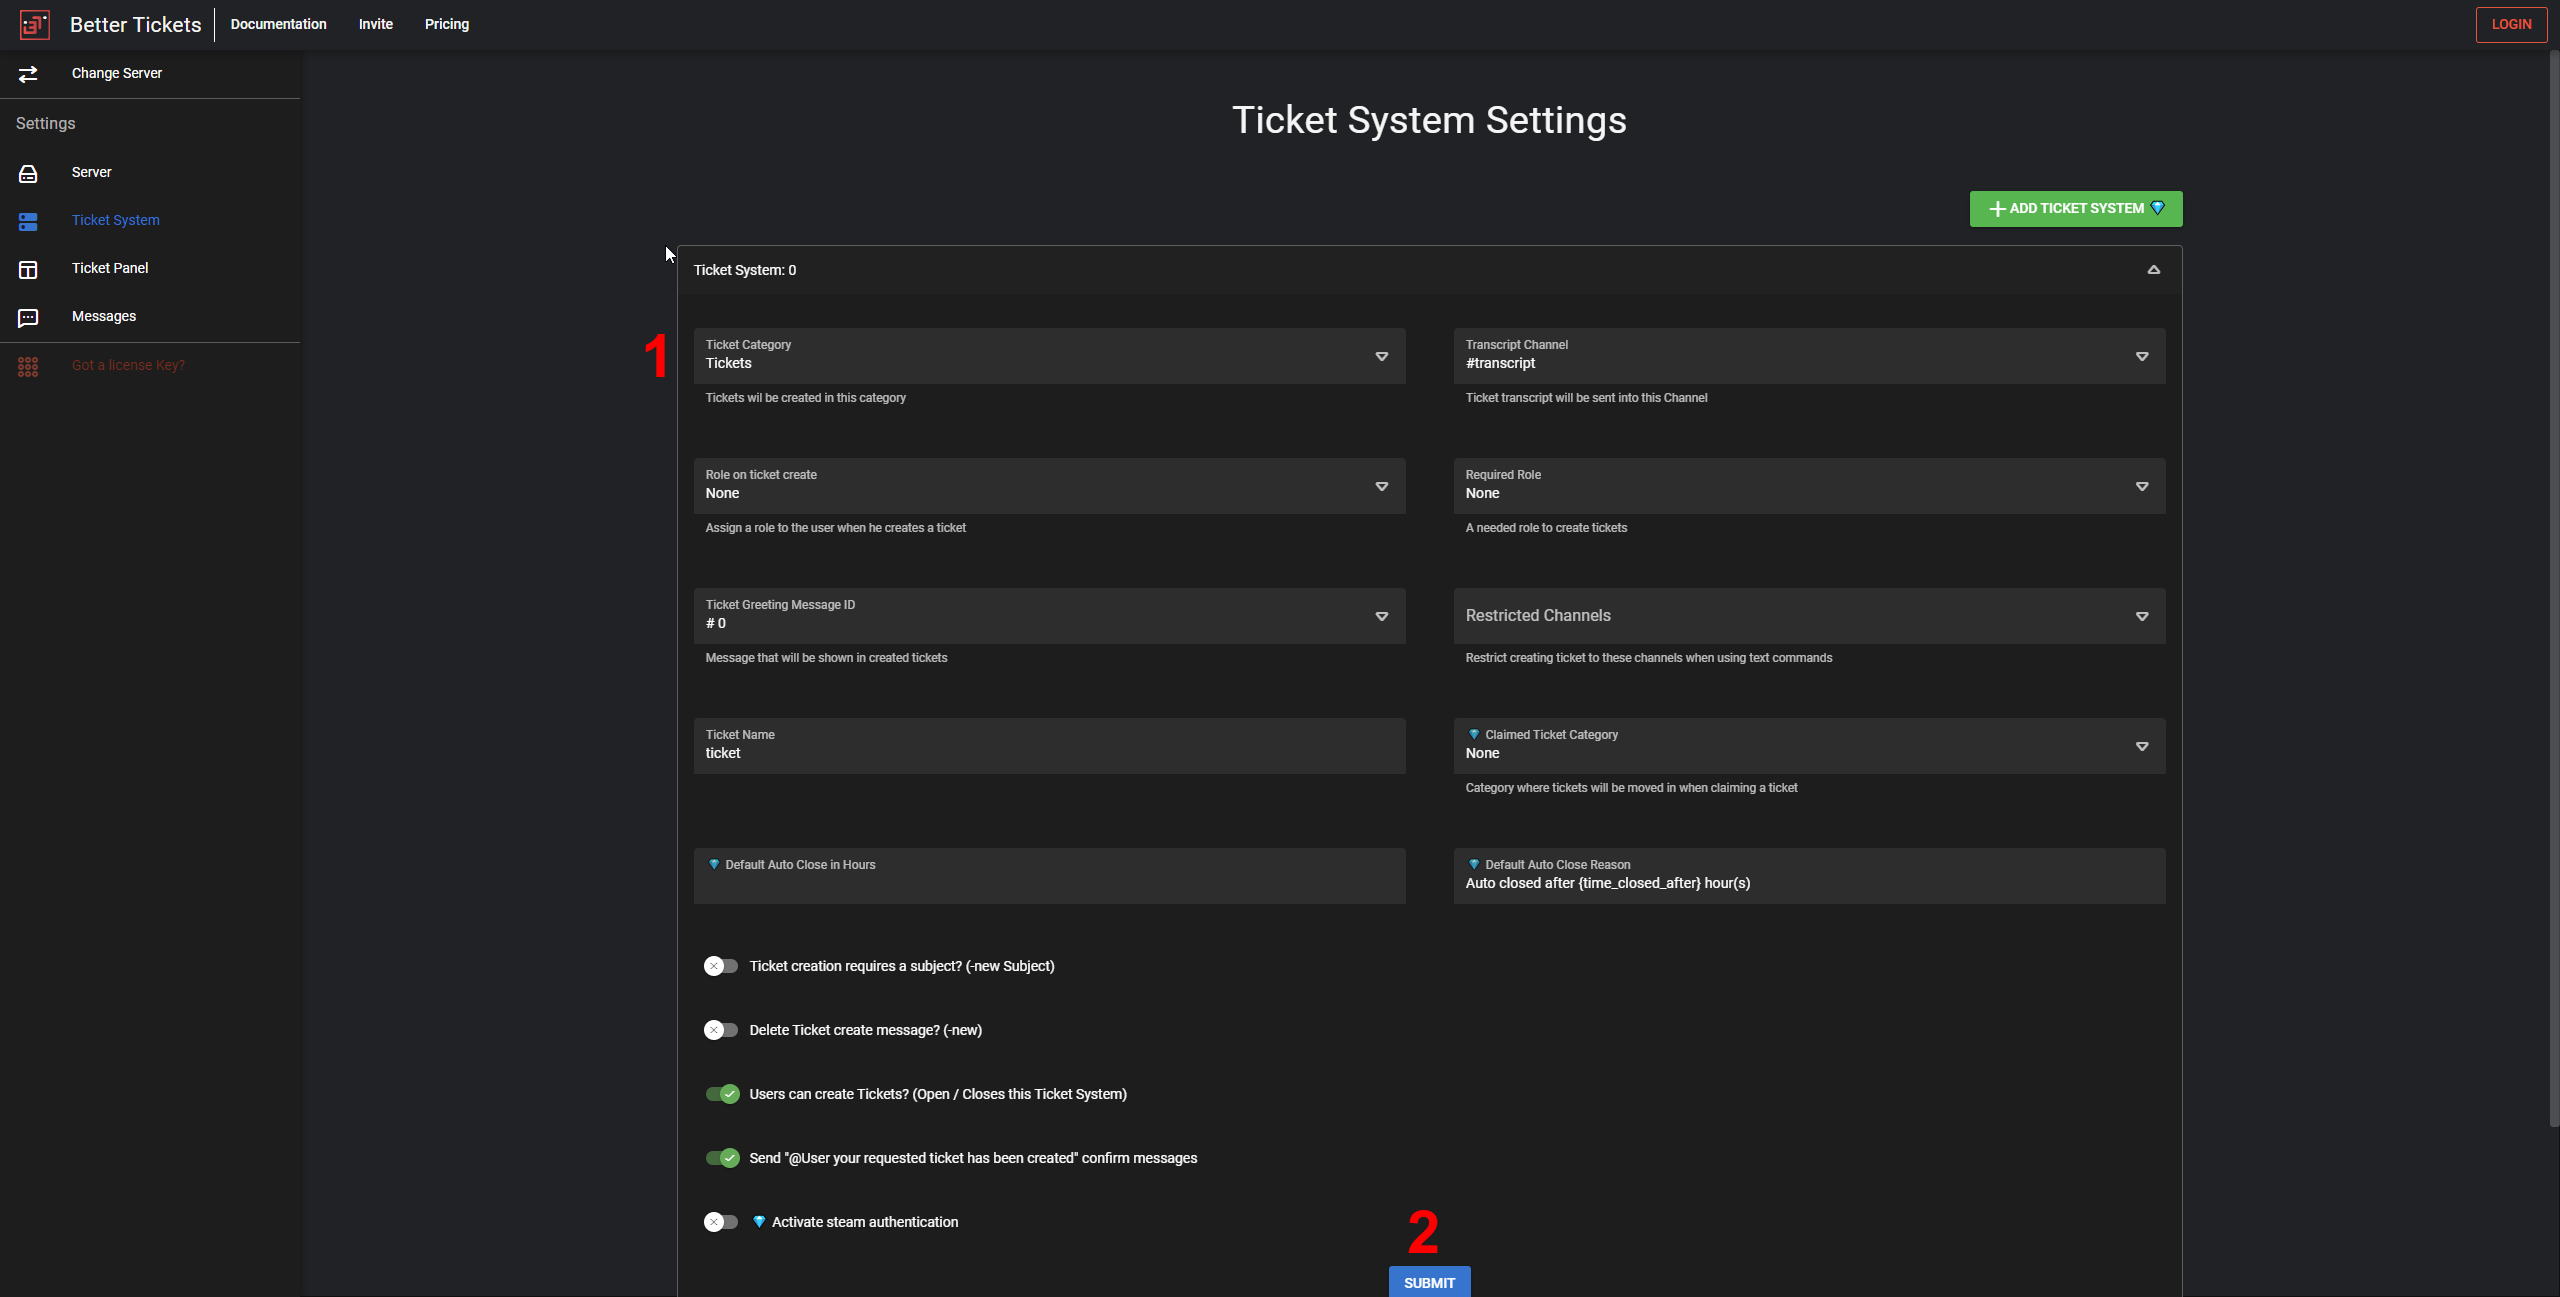
Configure your Ticket System
1. Go to theTicket Systemtab in the sidebar
2. Select your previously created ticket category where the tickets will be created in.
3. Submit your changes.
-
Go to your server in the Discord Client App.
1. Go to the server settings
2. In the categoryAPPSclick onIntegrations
3. SelectBetter Tickets
4. For the slash commands/blacklist,/ticketadd your supporter role so that they can use these commands
5. For the slash command/settingsonly allow the admin role if you have configured any in the dashboard -
You have now setup the most essential settings to get started. You can now start creating tickets with the slash command
/newand a ticket will show up in your ticket category
¶ Setup a Ticket Panel
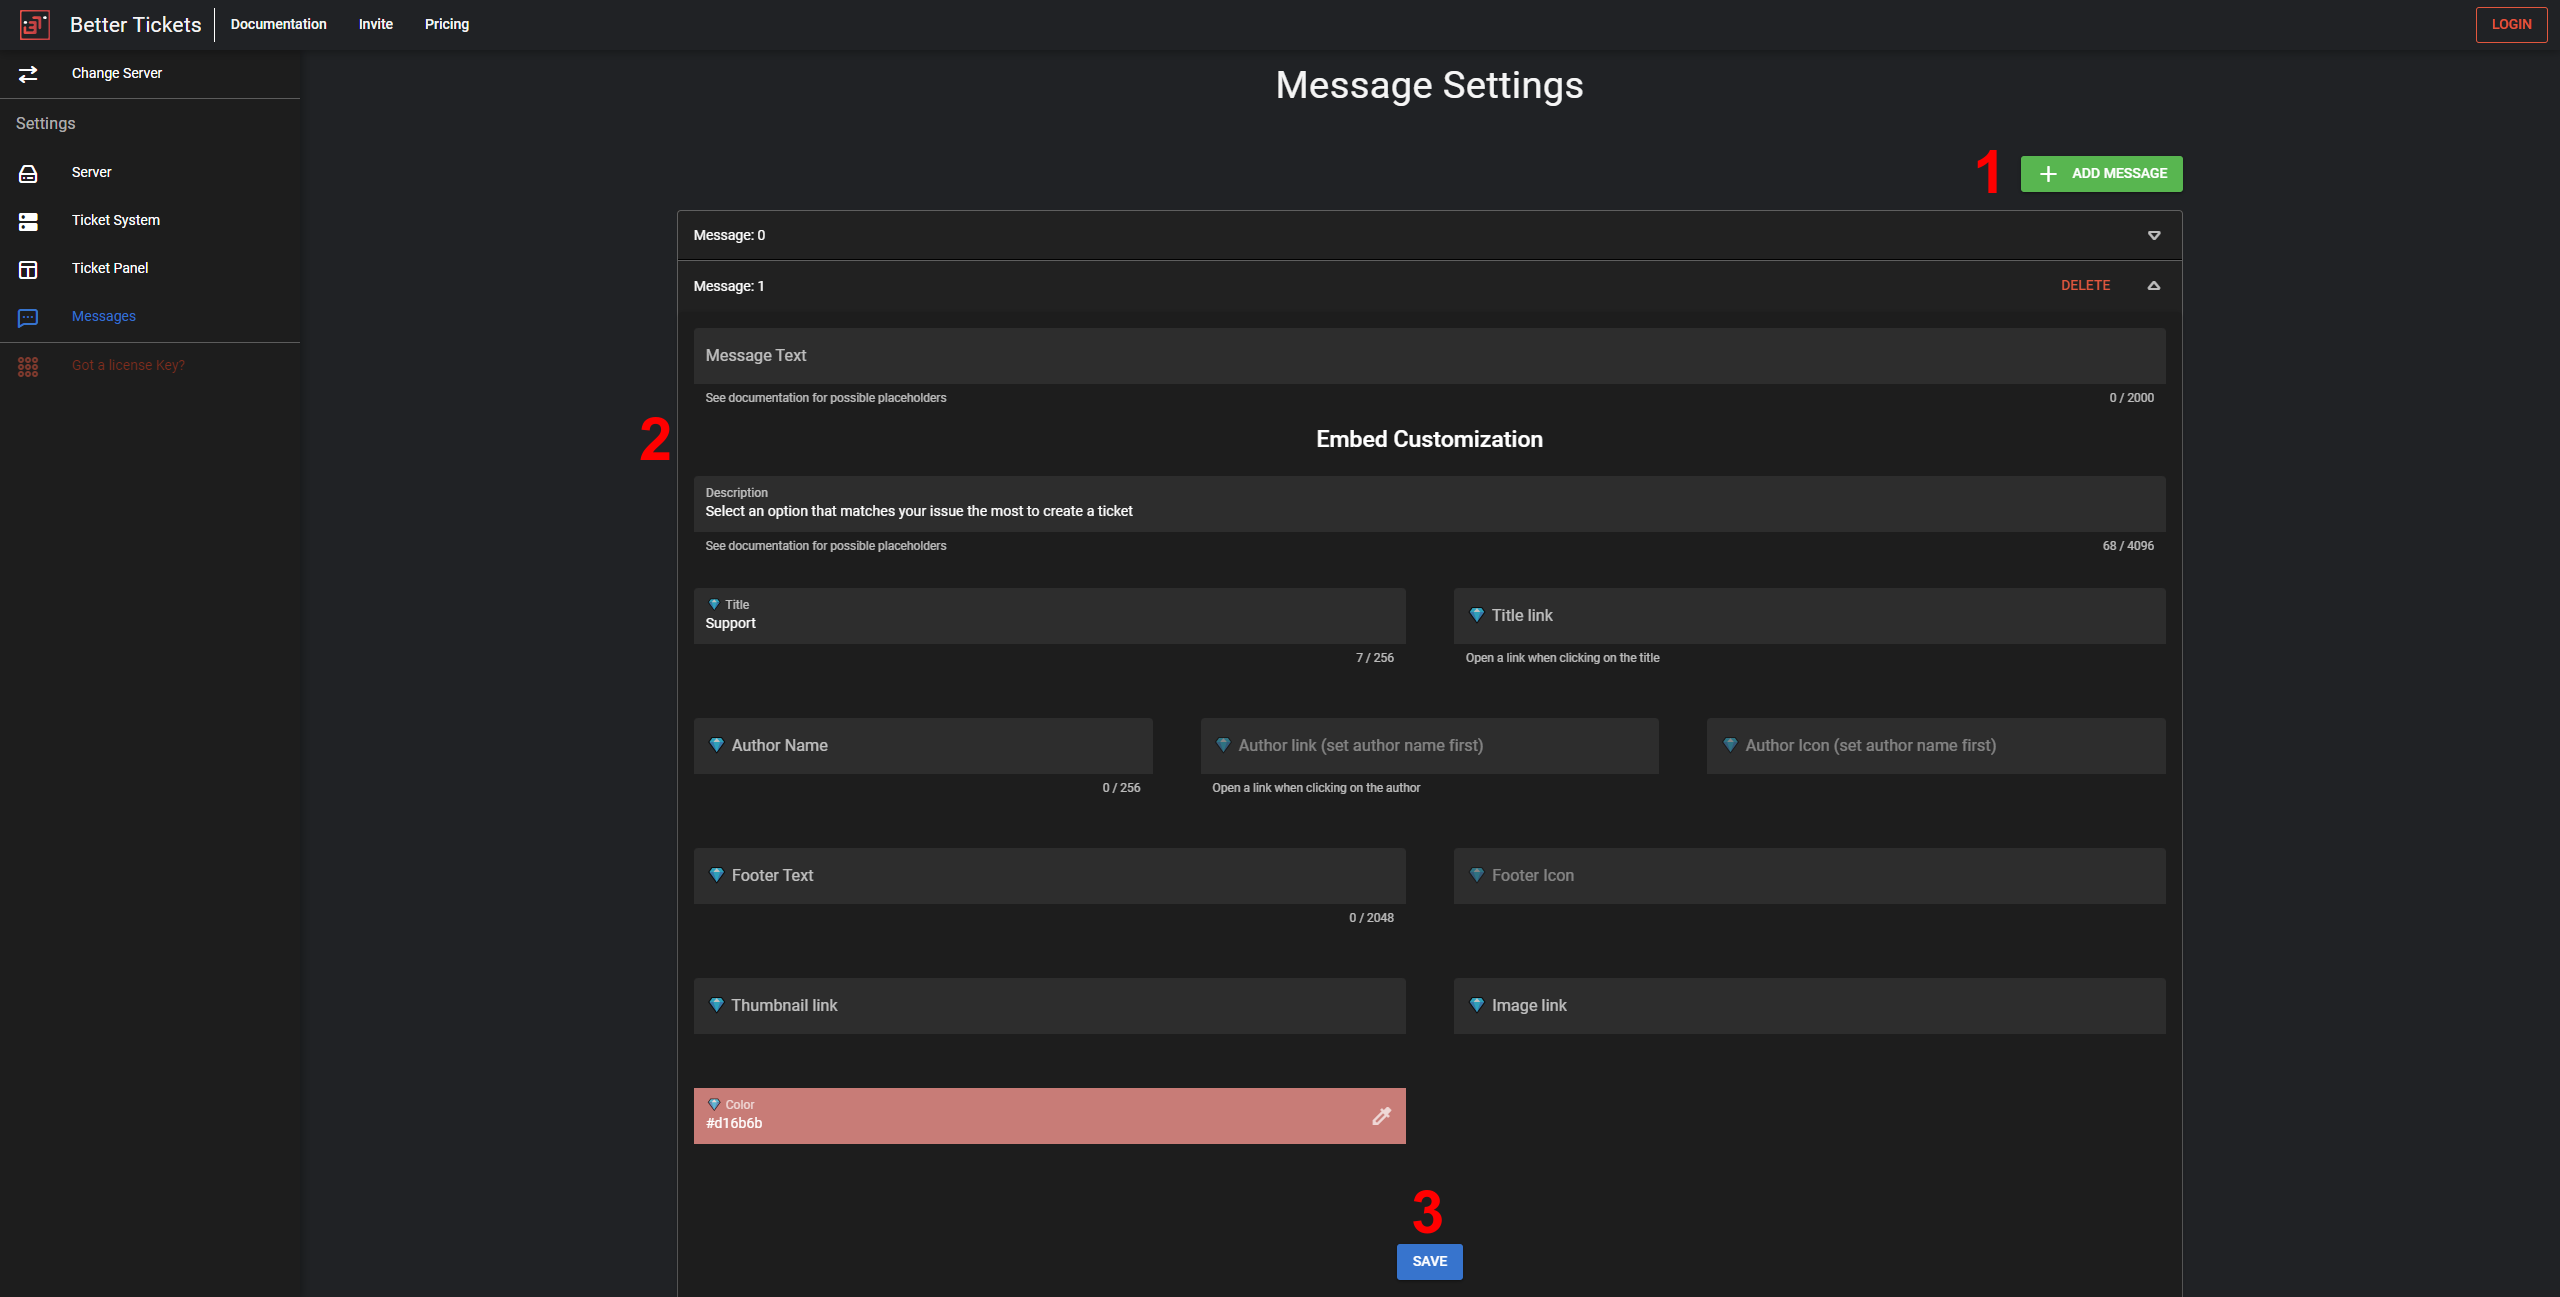
- Go to the
Messagetab in the sidebar
1. Add a new Message which will be what our Ticket Panel will look like when you send it to a channel. So make sure it contains everything user need to know before they create a ticket
2. Configure the message how you would like it to look like
3. Submit your changes
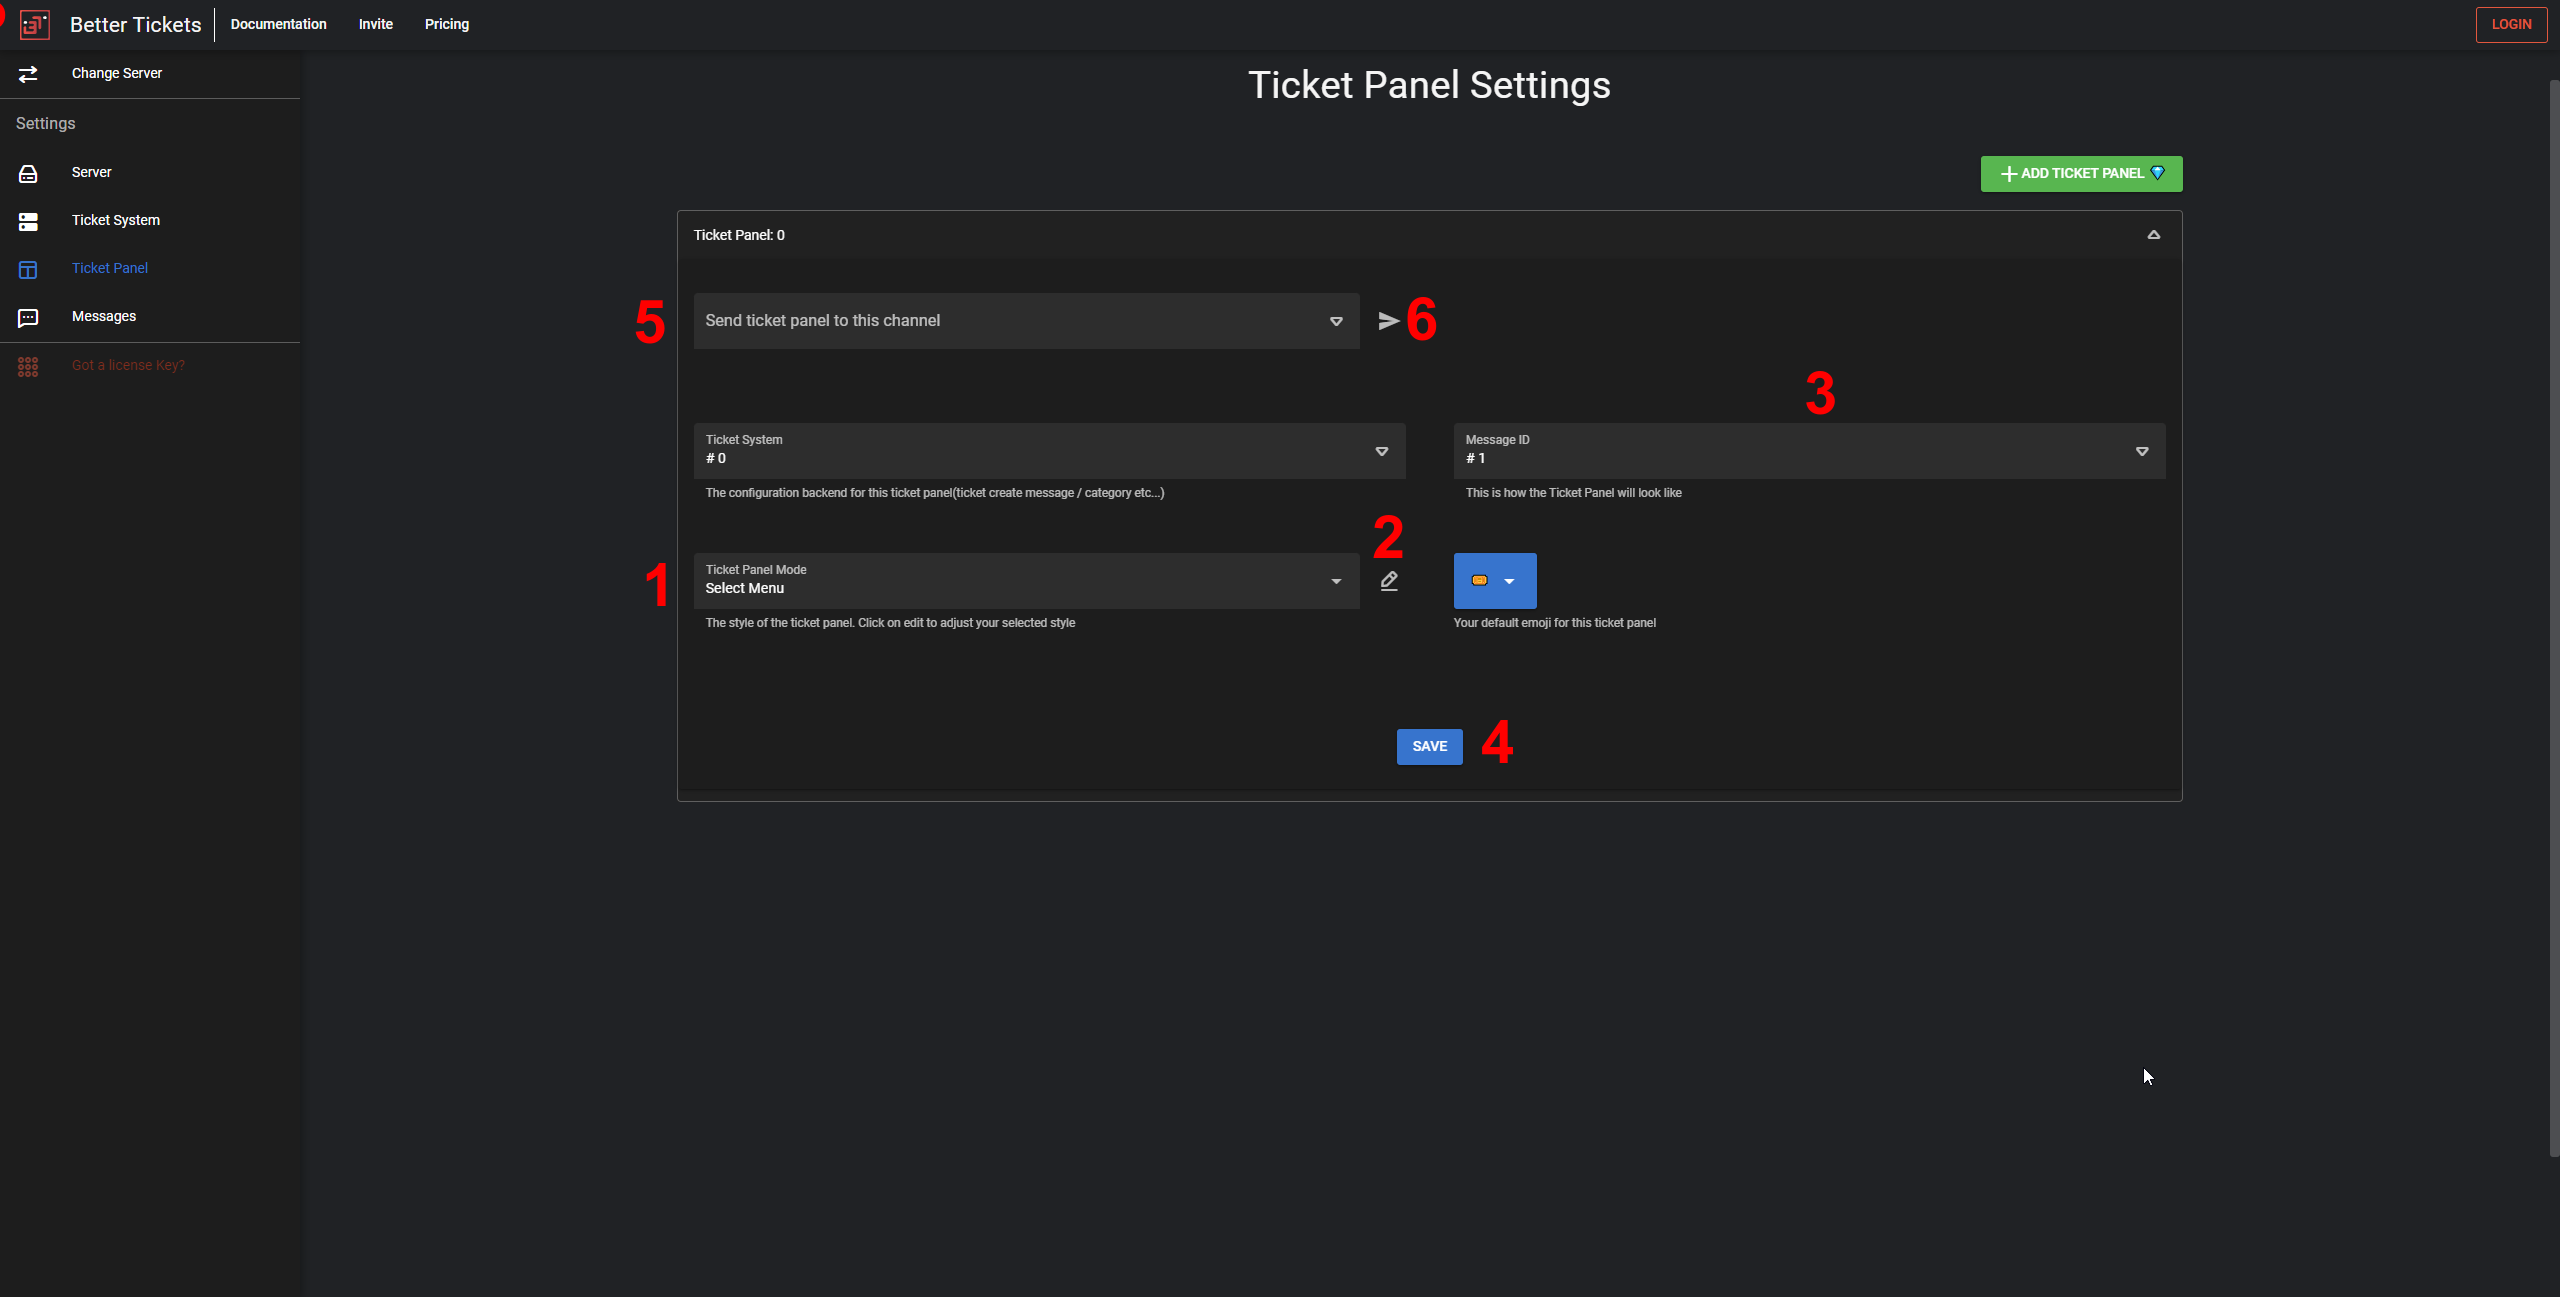
- Go to the
Ticket Paneltab in the sidebar
1. Select theTicket Panel Mode. This can be eitherreactions,buttonsor aselect menu
2. Click on the edit button right to theTicket Panel Modefield to configure your the settings for your selected mode
3. Select the ID of the emssage you have previously added of how the Ticket Panel will look like. Usually this is#1if you have followed this tutorial
4. Submit your changes
5. Select the channel where you want to send the Ticket Panel to.
6. Click on the send button to actually send your Ticket Panel to this channel
7. If the Ticket Panel does not show up, make sure you have setup theTicket Panel Modeproperly (step 2)